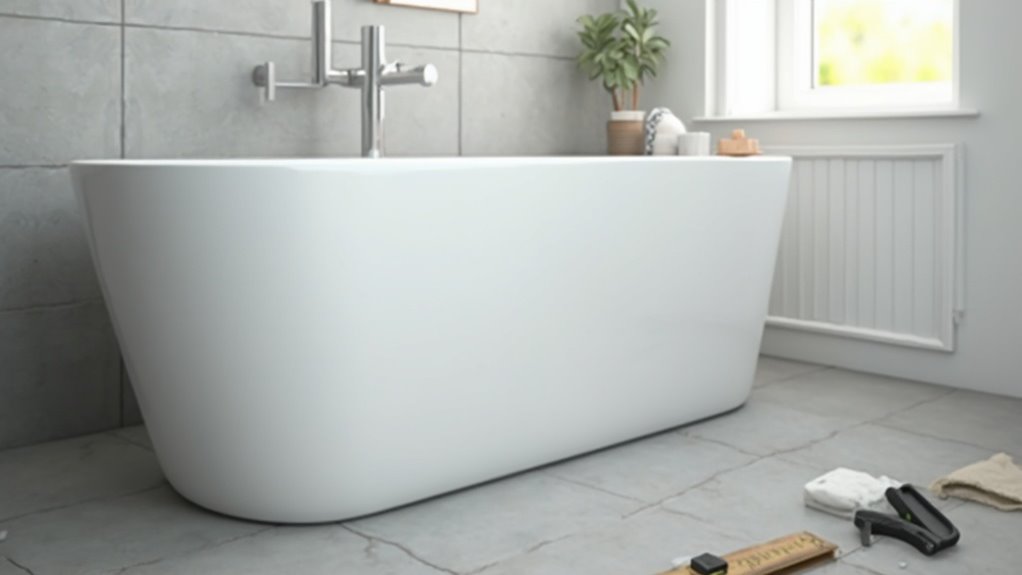
While a bathtub installation may seem like an intimidating task, it's actually a feasible DIY project for beginners who are willing to put in the effort. As you prepare to take on this challenge, you'll need to clear the area around your bathtub and gather the necessary tools and materials, including plywood, Liquid Nails, and plumbing components. But before you start, it's essential to understand the intricacies of the process to avoid costly mistakes. With a structured approach, you'll be well on your way to a successful installation - but first, you need to lay the groundwork.
Planning and Preparation
Numerous factors must be considered before commencing on a bathtub installation project, and thorough planning is essential to guarantee a successful outcome.
You'll want to start by clearing the bathroom of all personal belongings to create a safe and efficient workspace. Remove shower curtains, sliding doors, and any other obstructions, including plastic tub surrounds or tiles that may interfere with the installation process.
Next, mark the drywall with horizontal and vertical lines to identify where cuts will be made, using a drywall saw for precise removal. It's important to check for existing plumbing or electrical lines before cutting into the subfloor, as damaging these can complicate the installation.
Gather all necessary materials and tools, including Liquid Nails, plywood, a jigsaw, and a level, to streamline the process. By taking the time to plan and prepare, you'll facilitate a smooth bathtub installation process and avoid costly mistakes.
Always prioritize caution when working with existing plumbing and electrical systems.
Subfloor Installation Steps
You'll start the subfloor installation process by carefully removing the old subfloor, taking care to avoid damaging any plumbing or electrical lines.
Next, you'll install a new 3/4" plywood underlayment, using Liquid Nail to guarantee strong adhesion and matching the height of the surrounding floors.
Properly preparing the subfloor is vital to a successful bathtub installation, so take your time and make sure the surface is level and secure.
Prepare Old Subfloor Removal
Removing a damaged subfloor is an essential step in bathtub installation, especially when water damage is present, as it can compromise the structural integrity of the bathroom and create an ideal environment for mold growth.
You'll need to inspect the subfloor for any signs of damage or rot, particularly around the bathtub drain. If you find any damage, use a hammer or super bar to carefully lift and remove the affected sections. Be cautious of any plumbing or electrical lines beneath the subfloor, as you don't want to cause further damage or create a safety hazard.
As you remove the old subfloor, take note of the remaining subfloor's height consistency to guarantee a smooth installation process.
Remember, a sturdy subfloor is essential for supporting the weight of the bathtub and withstanding water exposure. Set aside the debris, and focus on preparing the area for the next step.
Don't forget to check for any additional damage or issues that may impact the installation process. Properly removing the damaged subfloor will help guarantee a successful bathtub installation and prevent future complications.
Install New Plywood Underlayment
Once the damaged subfloor is removed, installing a new plywood underlayment becomes the next vital step in the bathtub installation process.
You'll start by laying down a new 3/4" plywood subfloor, applying Liquid Nail to guarantee strong adhesion. Make sure it matches the height of the surrounding flooring to avoid any discrepancies.
For added stability, layer a second 1/2" plywood on top of the first layer, spreading additional Liquid Nail for bonding before nailing with a nail gun.
As you work, keep in mind the location of the bathtub waste and verify the subfloor is level to avoid complications during installation.
Prior to installing the new tub, dry fit it to check for proper alignment. Use appropriate nailing techniques to secure the plywood layers, creating a solid foundation for the bathtub.
A well-installed subfloor is essential for a successful bathtub installation. By following these steps, you'll be able to guarantee a stable and level surface for your new tub, setting the stage for a smooth and efficient installation process.
Properly installed plywood underlayment will also help prevent future issues with your bathtub.
Building the Bathtub Surround
Before beginning construction, take a moment to dry fit the bathtub in its intended position, verifying accurate markings of the plumbing walls and proper alignment of the main wall and knee wall supports. This step is vital to guarantee a seamless fit between the bathtub and the surround.
Next, frame the walls using 2x4 studs placed 16 inches on-center, making certain all studs are plumb and even for a secure structure.
Consider the following key points when framing the walls:
- Stud placement: Space studs 16 inches on-center for best support.
- Wall height: Confirm the framed walls extend to the desired height for the surround.
- Plumb and level: Verify that all studs are plumb and the walls are level for a secure structure.
- KERDI-BOARD integration: Incorporate Schluter KERDI-BOARD into the wall construction for effective waterproofing.
After framing, install a backer board, such as Hardi board, if you plan to tile, confirming it extends to the appropriate height for the desired finish and water resistance.
Precise measurements are essential throughout the process to avoid misalignment and guarantee a seamless fit with the bathtub.
Plumbing and Drain Assembly
You'll need to install the drain assembly, which consists of the overflow drain, waste drain, and their respective pipes, to guarantee proper drainage and prevent flooding.
To do this, you'll follow specific plumbing installation steps, including securing the drain assembly with plumber's putty and tightening the overflow plate to prevent leaks.
Drain Assembly Components
The drain assembly is an important component of the bathtub installation process, consisting of several key parts that work together to manage water flow and prevent spillage.
You'll need to familiarize yourself with the overflow drain, waste drain, overflow drain pipe, and tub waste pipe to guarantee a proper installation.
When selecting pipe materials for your drain assembly, consider the following options:
- Brass: Offers high durability and resistance to corrosion.
- PVC: A cost-effective option with good resistance to corrosion.
- ABS: A durable and impact-resistant option, but may be more prone to corrosion.
- Other materials: Depending on your local plumbing codes and regulations.
The overflow drain, located on the side of the tub, allows excess water to flow into a pipe, while the waste drain, located at the bottom, facilitates the primary outflow of water.
A drain stopper is also essential to prevent clogs and guarantee smooth water flow. Proper installation and maintenance of these components are vital to prevent common issues like leaks and clogs.
Plumbing Installation Steps
Marking the drain position is the first step in the plumbing installation process for a bathtub, and it's vital to do this after the wall framing is completed to guarantee accurate placement.
You'll use this mark to guide your jigsaw or reciprocating saw as you cut the subfloor for the drain. Ascertain the cut is aligned with the existing plumbing lines to avoid costly rework.
Next, you'll assemble the waste and overflow pipes. It's essential to complete this step before installing the tub to guarantee a watertight connection.
Apply silicone to the connections to prevent leaks. Be careful not to overtighten the connections, as this can cause cracks in the tub material.
Once the waste and overflow pipes are assembled, confirm that all plumbing connections are secure and aligned with the p-trap.
This guarantees efficient drainage performance and prevents sewer gas escape. Double-check that the drain and overflow are properly connected to prevent water damage and confirm a safe bathing experience.
Leak Prevention Measures
Assembling the waste and overflow pipes is a major milestone in the plumbing installation process, but the work doesn't stop there - verifying these connections remain watertight is equally important.
To prevent leaks, you need to take extra measures. Regularly inspect and maintain the gaskets and seals around the drain and overflow to verify they're in good condition. Worn components can lead to leaks, and you want to catch any potential issues before they become major problems.
When installing the drain assembly, use plumber's putty to create a watertight seal. This is essential for preventing water from seeping through the connections.
Here are four key steps to prevent leaks:
#1. Secure the drain assembly: Verify the drain assembly is tightly secured to the bathtub to minimize the risk of leaks.
#2. Tighten the overflow plate: Secure the overflow plate tightly to prevent leaks.
#3. Check the overflow pipe: Make sure the overflow pipe is unobstructed and functional.
#4. Test for leaks: Run water through the drain and overflow areas to test for leaks, allowing for prompt repairs if necessary.
Installing the Bathtub
With your subfloor properly prepared, it's time to lower the bathtub into place. Carefully position the tub, guaranteeing it's centered and even. Use a level to check the tub's position, adjusting as necessary to confirm it sits evenly. You want to make certain the tub lip is level and plumb to prevent water from pooling or draining unevenly.
As you lower the tub, align the tub lip with the wall studs. You'll secure the tub to the studs later, but for now, focus on getting it into position. If you notice any gaps between the tub flange and studs, use shims to achieve a tight fit. This will prevent movement over time and assure a stable installation.
Once the tub is in place, inspect the area where the tub meets the floor. You'll apply clear silicone caulk around the base of the tub later to create a watertight seal.
For now, double-check that the tub is level and the tub lip is securely positioned. Make any necessary adjustments before proceeding to the next step. A proper installation guarantees a safe and enjoyable bathing experience.
Securing the Bathtub
Tub installation enters its critical phase as you begin securing the bathtub to the surrounding structure. To guarantee a firm attachment, secure the tub to the stringer using 1-3/4-inch galvanized roofing nails at every stud location.
Make sure to use stainless steel screws to fasten the tub to wall studs, checking for proper alignment and leveling throughout the process.
As you secure the bathtub, keep the following key considerations in mind:
-
Apply silicone caulk in an S-pattern: On the stringer before placing the tub to enhance stability and prevent movement.
-
Check for gaps: Between the tub flange and studs, using shims to guarantee a snug fit and proper support.
-
Regularly inspect the installation: For any signs of misalignment or movement after securing the tub to guarantee ongoing stability.
-
Maintain proper alignment: And leveling throughout the securing process to prevent future issues.
Final Inspection and Testing
Completing a successful bathtub installation requires meticulous attention to detail, and the final inspection and testing phase is no exception.
You'll want to conduct a thorough inspection of all plumbing connections to guarantee there are no leaks at the drain, overflow, or waste pipes before sealing any access points. Fill the tub with water and test its drainage, observing for any signs of slow drainage or backflow, which could indicate potential blockages or improper installation.
Next, use a level to check the tub's levelness again after installation. If necessary, adjust the tub using shims to ascertain it's properly aligned.
Inspect the caulking around the tub's edges for uniformity and completeness, making sure it creates a watertight seal to prevent water from seeping behind the tub.
Finally, perform a final visual inspection of the tub and surrounding area, looking for any gaps, misalignments, or cosmetic issues that need to be addressed.
Bathtub Installation Tips
Now that you've successfully inspected and tested your bathtub installation, it's time to focus on best practices that can make or break a smooth installation process.
To guarantee a stable and secure install, you'll want to support the tub with a properly prepared subfloor and wall supports. Here are four key considerations:
-
Subfloor Preparation: Remove any damaged material and use 3/4" plywood for a stable base, applying Liquid Nail for strong adhesion.
-
Wall Supports: Place studs 16 inches on-center and utilize Schluter KERDI-BOARD for effective waterproofing.
-
Dry Fitting: Always dry fit the new tub to confirm alignment and levelness before securing it, as a stable installation is critical for preventing future plumbing issues.
-
Secure Attachment: Use 1-3/4-inch galvanized roofing nails at each stud location, guaranteeing the tub lip is securely pinched against the studs with washers for added stability.
Common Installation Mistakes
During the installation process, it's easy to overlook essential steps that can ultimately lead to costly mistakes. You'll want to verify the subfloor is level before installation to prevent improper tub alignment and potential leaks. This is especially vital for freestanding tubs, which require a sturdy base to function correctly.
When removing the subfloor, don't forget to check for existing plumbing and electrical lines. Damaging these can result in costly repairs or safety hazards. A bead of silicone can help seal any gaps, but it's not a substitute for proper planning.
Inadequate adhesive or skipping the application of Liquid Nails can compromise the bond between subfloor layers, increasing the risk of movement and instability.
Additionally, over-tightening connections during drain assembly can crack the tub, necessitating costly repairs or replacement. To avoid misalignment with the wall and plumbing, dry fit the tub before securing it.

